Channel settings for sending notifications
After configuring email, SMS services, and Facebook Messenger in posify, businesses can set which actions are triggered by customers, and relevant notifications will be sent to remind customers.
Email settings
Before using email notifications, you need to set up your email settings as follows:
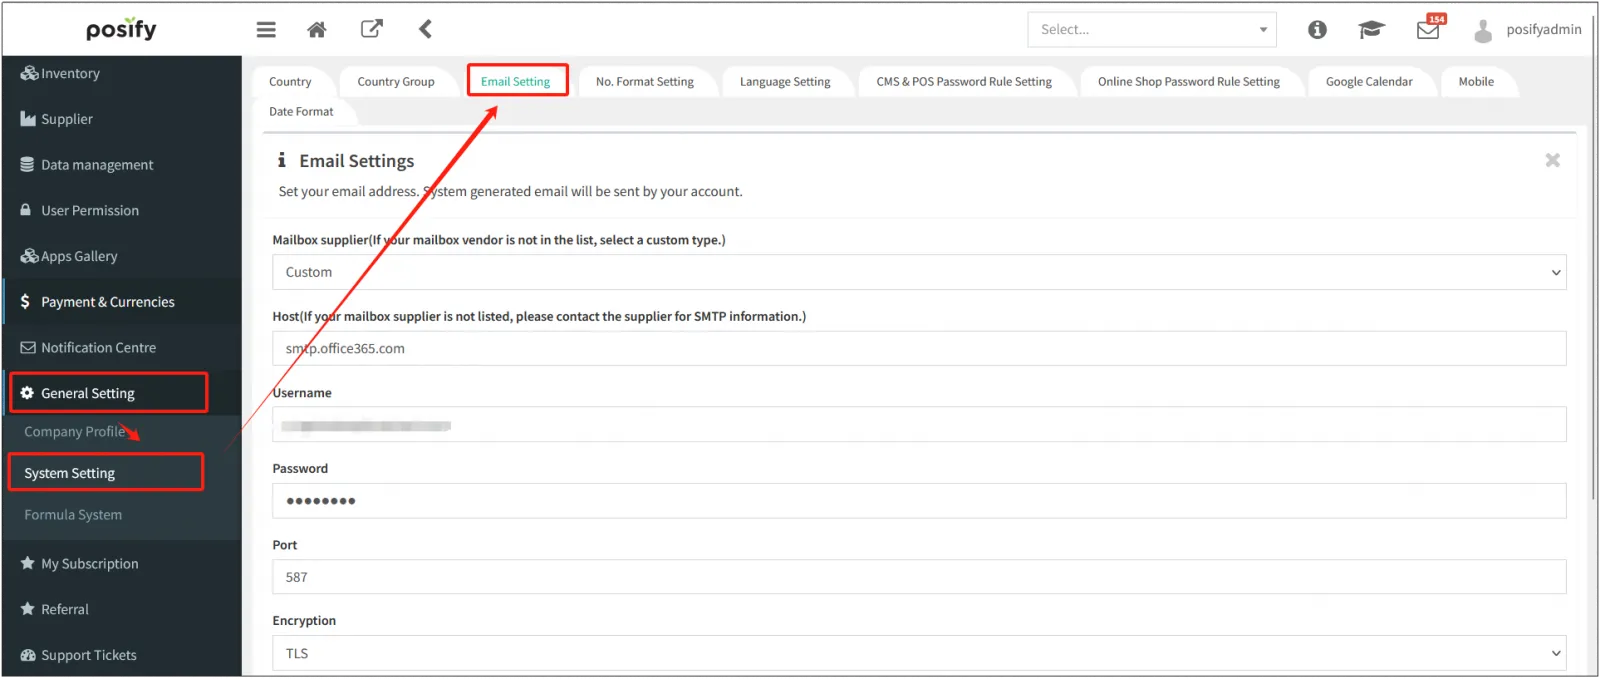
Open the CMS![]() click General Settings
click General Settings![]() click System Settings
click System Settings![]() click Email Settings.
click Email Settings.
For more information on how to set up your email, see Playbook - Other Settings.
SMS settings
Before using SMS notifications, you need to set up the SMS provider, which is set in the following locations:
Open the CMS![]() tap on Apps
tap on Apps![]() tap on SMS Providers.
tap on SMS Providers.
For more information on how to set up an SMS provider, see playbook - SMS Provider.
Messenger settings
Before using Messenger notifications, you need to set up the online customer service settings, which are located in the following locations:
Open CMS![]() click on Online Store/App
click on Online Store/App![]() click on Live Chat.
click on Live Chat.
Click on Facebook Messenger to set it up.
Notification settings
Before you can use notifications, you need to make a series of settings.
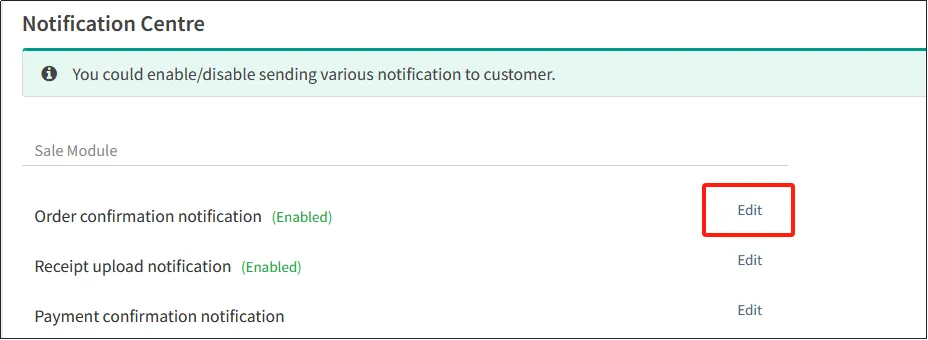
Open CMS![]() click Notification Management.
click Notification Management.

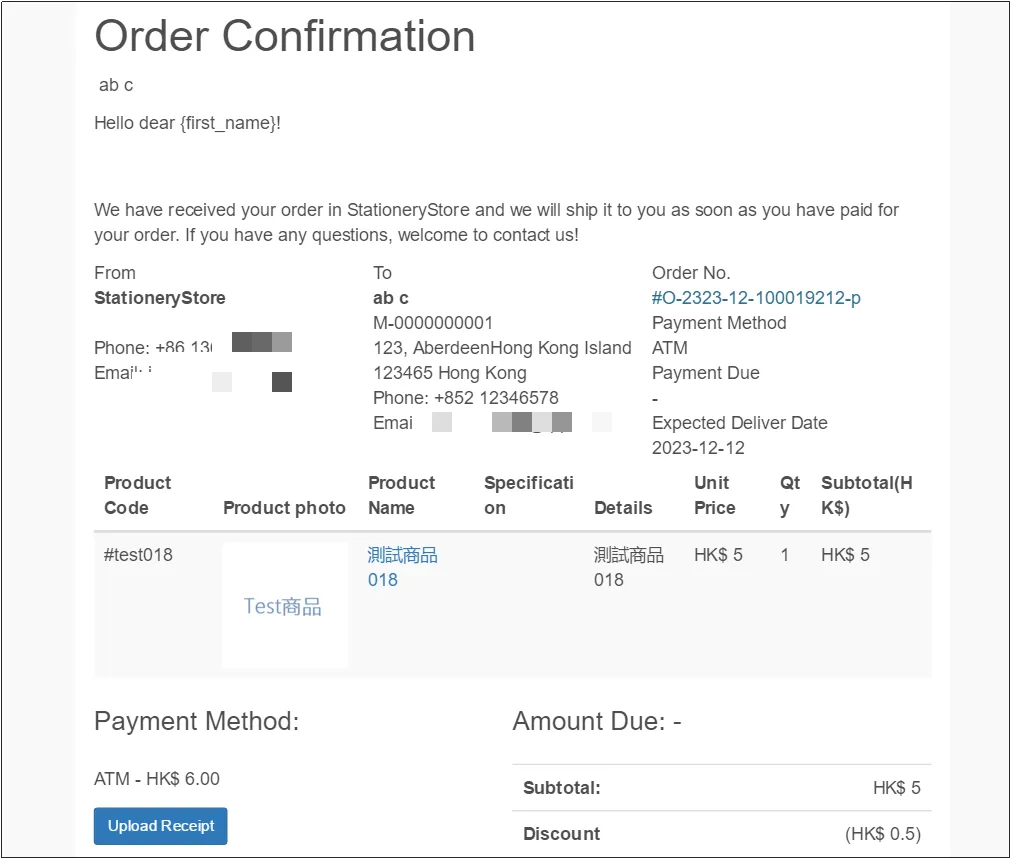
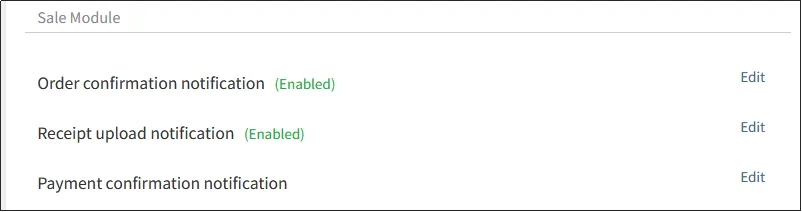
Take, for example, an order confirmation notification.
Click [Edit] to the right of the order confirmation notification.
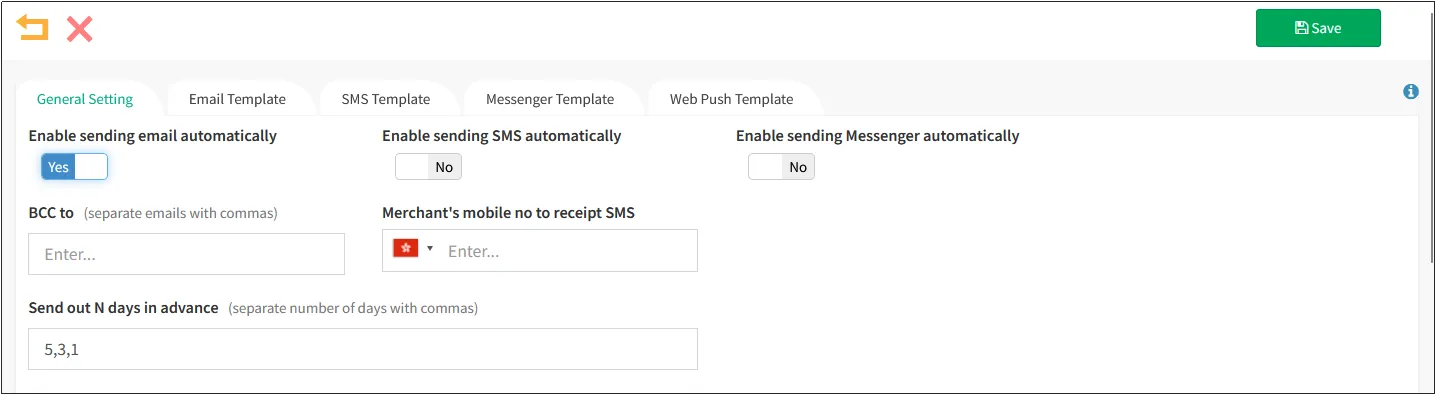
On the tab settings, you can select whether to enable the notification and how to enable the notification.
For example, if you want to enable email notifications, turn on Enable automatic email notifications. When email notifications are enabled, if a merchant wants to send an email to their customers with a copy of the email to their mailbox, they can enter the email address to receive the CC email under [BCC Copy]. Similarly, to enable SMS notifications, you can also enter [Merchant's SMS-accepted mobile phone number], so that when sending SMS notifications, an SMS will also be sent to the mobile phone number entered by the merchant.
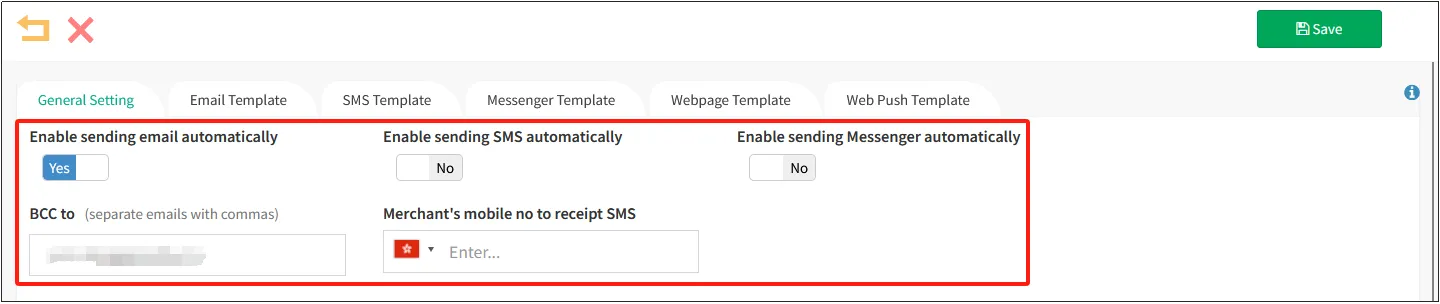
When sending an automatic e-mail notification, the e-mail address in [BCC Copy] will also receive the notification e-mail.
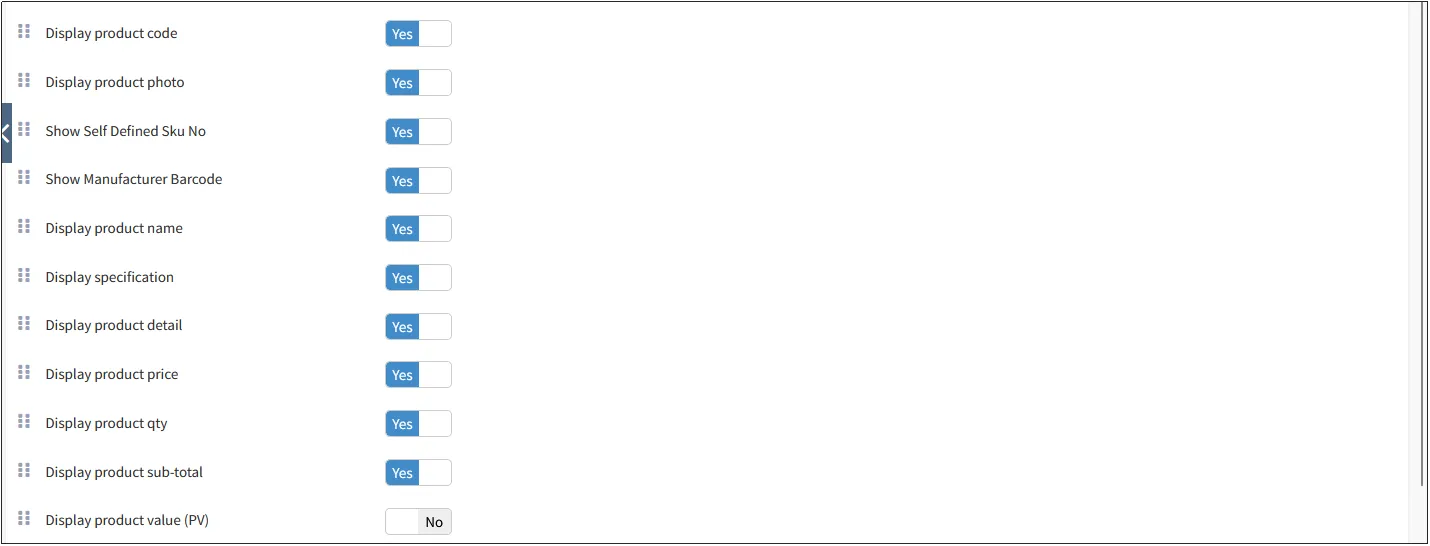
Basic template setting: refers to the part of the notification that needs to be displayed, and can be marked "yes" if needed, and "no" if not.

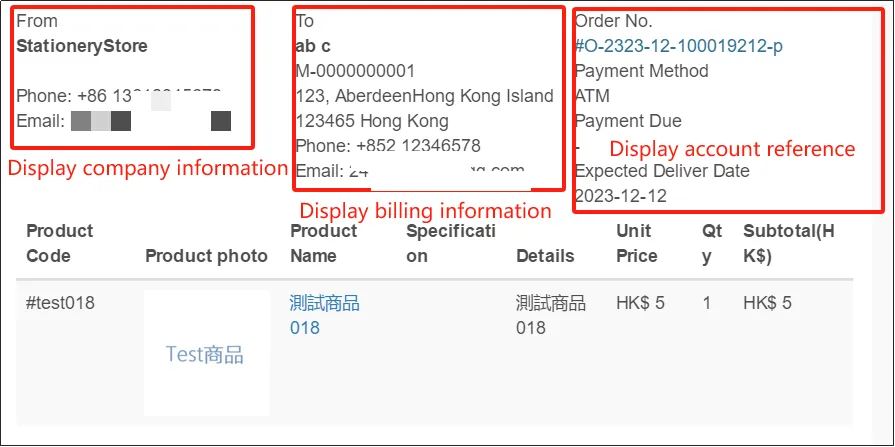
Here is an example of an order email notification received, which is displayed in the following locations.
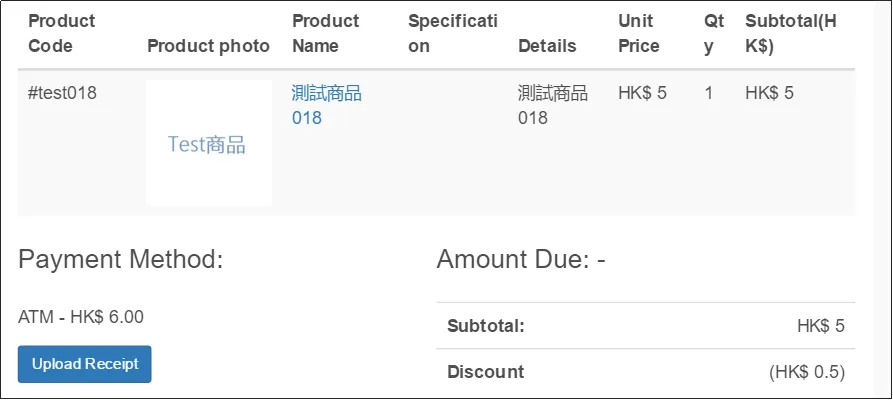
The display order of the bill data can be changed by holding down the icon in front of you and dragging it up and down.
Template
Click the tab on the back page to edit the notification template.
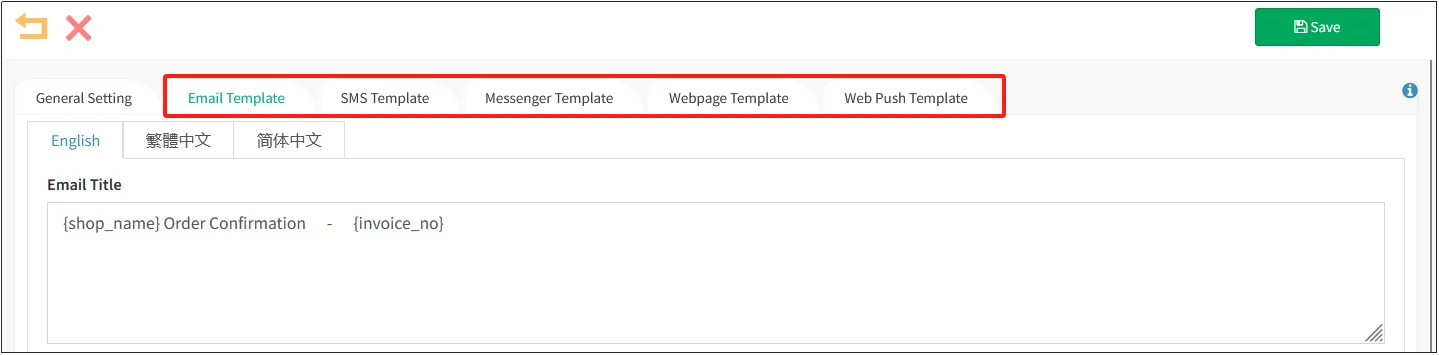
Click the Email Template tab to edit the email notification template.
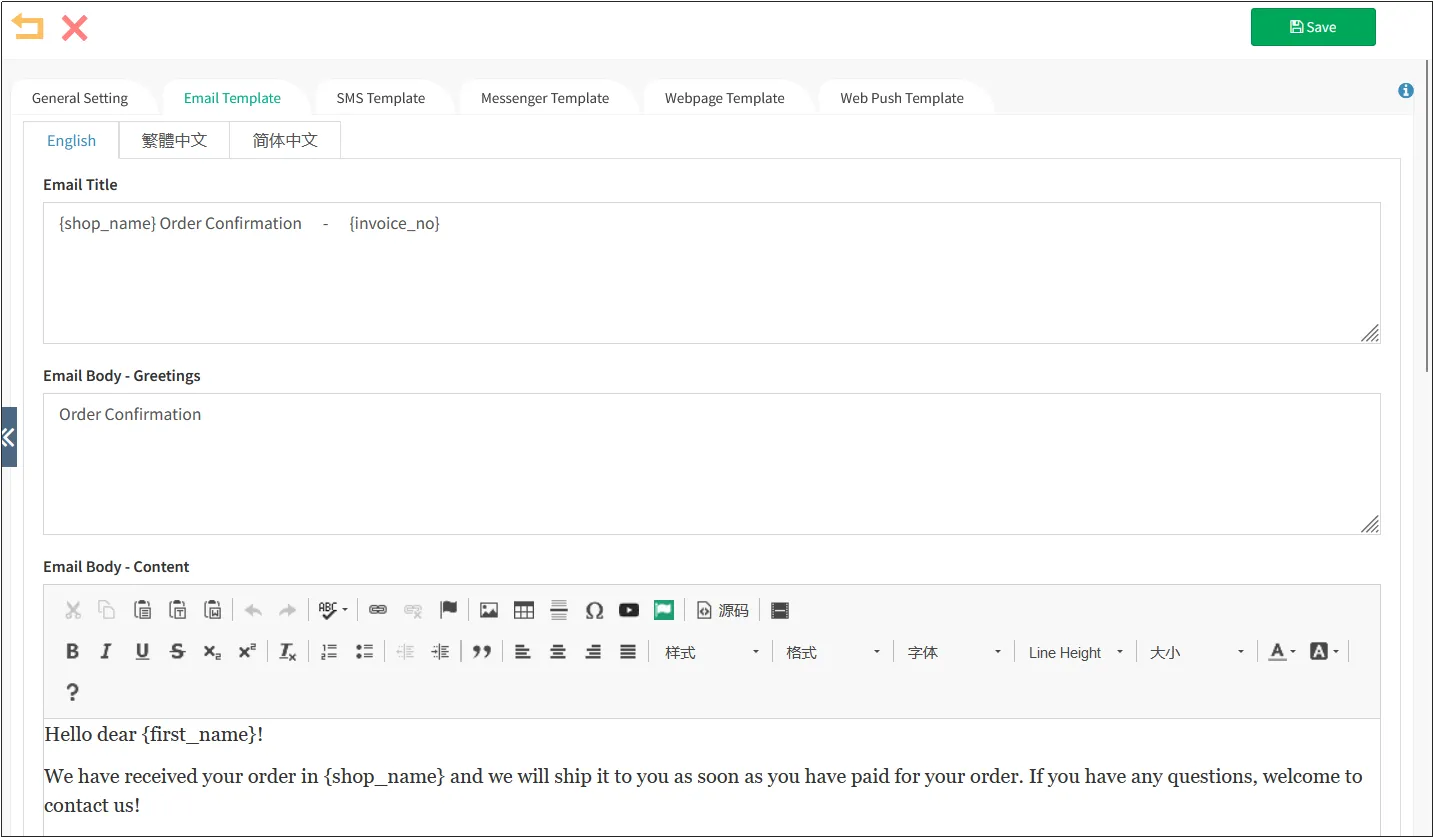
Enter the contents of the e-mail title, e-mail subject - greeting, and e-mail subject - content.
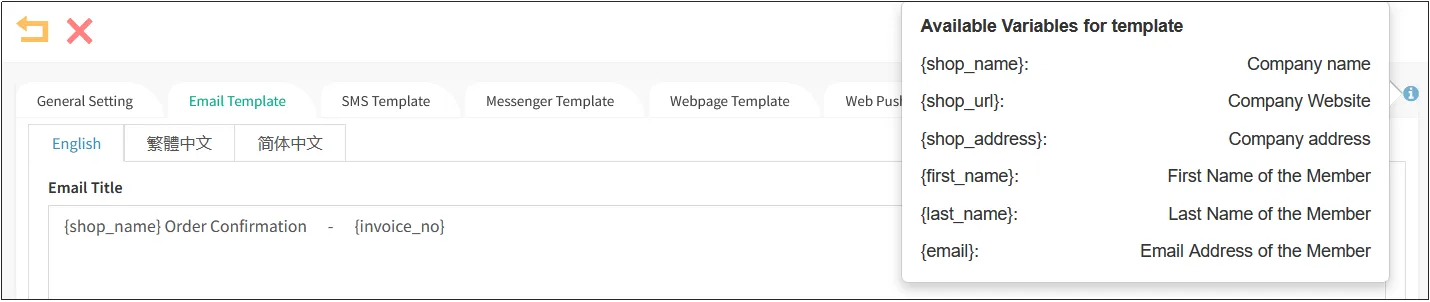
Click on the small icon in the upper right corner to view the available variables of the template, including the business name, company URL, member name, etc.
For example, if you use the variable available in the template [Member's Name], the system will automatically replace "{first_name}" with the name of the recipient member when sending the notification.
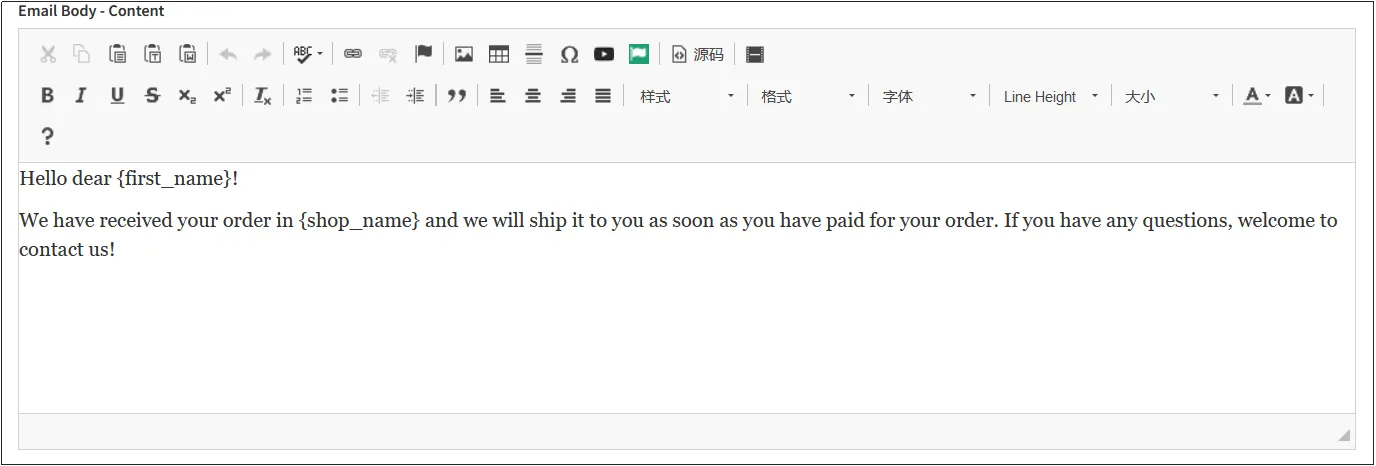
For example, you can edit a template using the variables available to the template, as shown in the following image.
Enter [Email Body-Bottom], which is generally used for payment. Here you can use the variables available in the template, such as [Business Name], [Business Address], etc.

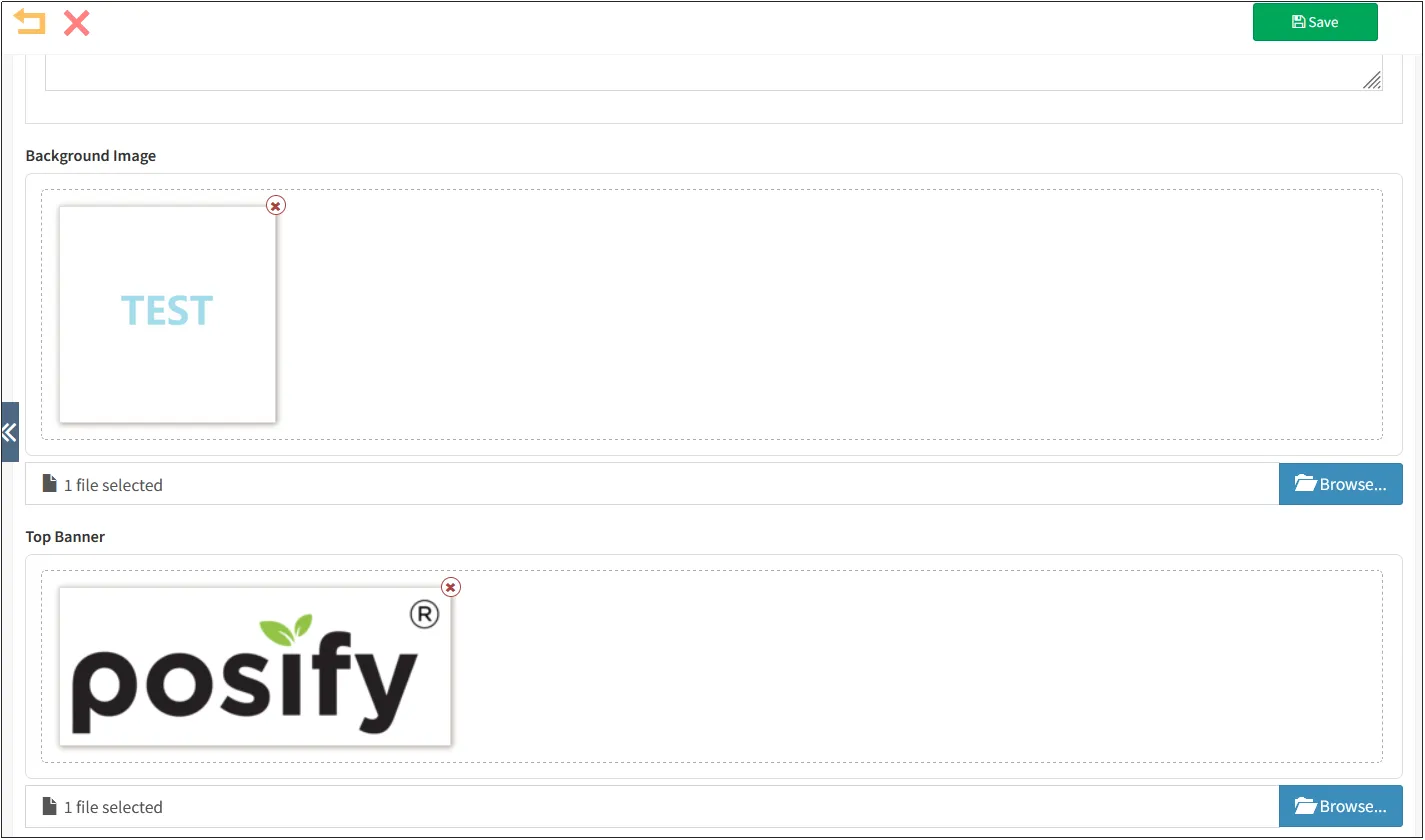
You can also upload a background image from your notification email as well as a top ad.
When you are done editing, click "Save" in the upper right corner.
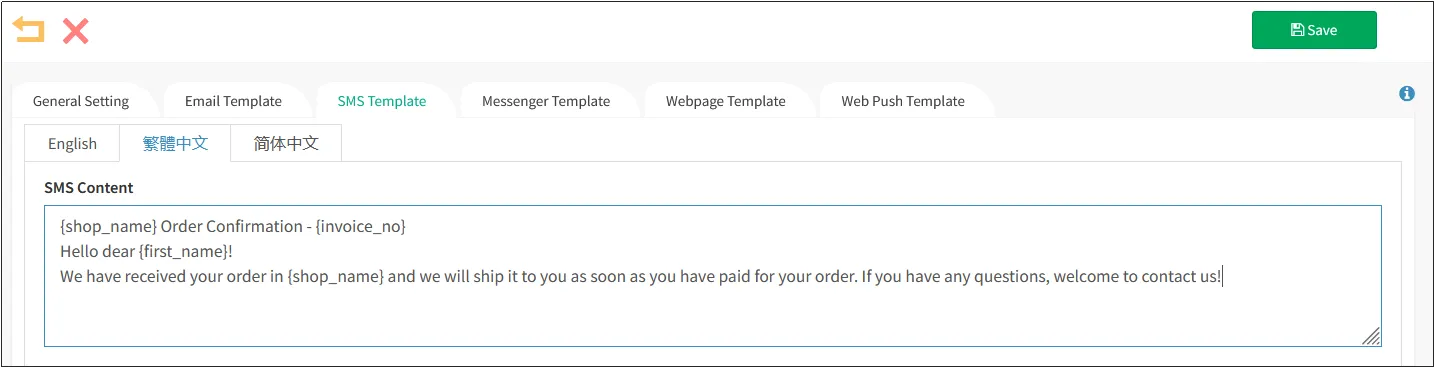
Similarly, by clicking on the SMS template, you can edit the content of the SMS. When you are done editing, click "Save".
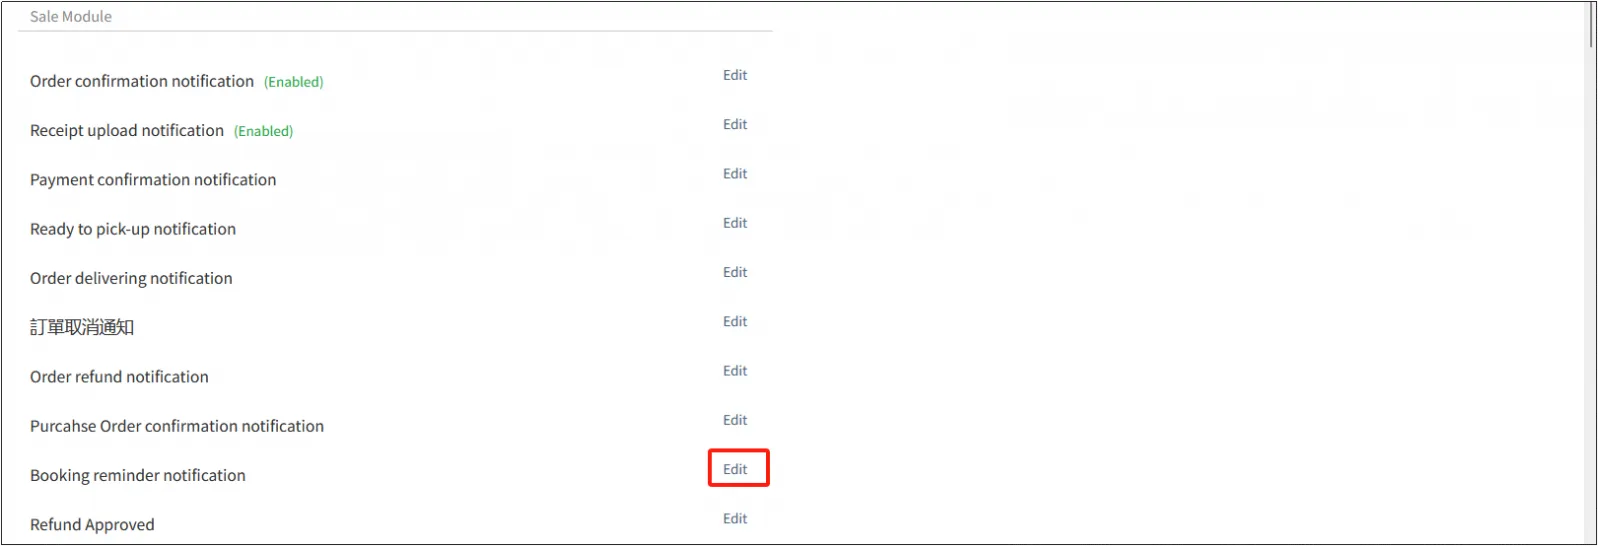
Notifications such as receipt upload notifications, pickup reminder notifications, delivery reminder notifications, and order refund notifications are set up in the same way as order confirmation notifications.
Enabled notifications display "(Enabled)".
Click [Edit] to the right of the appointment reminder notification.
Advance notification: Refers to the number of days before the appointment date after the service is booked, the customer needs to be reminded of the "separation". As shown in the figure below, a notification email will be sent 5 days, 3 days, and 1 day before the appointment date.